Making The Hedeby Set - an overview
For the past 4 years I have had a side project where I am working on recreating the find from the Hedeby Arrow find in Denmark. For the longest time I have held off writing anything about it with the plan that I would put something out in a finnished state. However due to various circumstances the process has taken a lot longer that I could have forseen. For this reason I will start to publish the process and thoughts moe as I go rather than holding the whole thing. Maybe that will also help me keep on track with the work.
Originally planned as a full on replica sett, this project has morphed into a prototype an technuique testing task. When I started I had mainly studdied the archeological documentation and descriptions, thinking I had a pretty good idea of what as ahead of me. I could not have been more wrong.
Several aspects of the build have shown to be surprising and the initial understanding has been challenged by the aspect of actually performing the work. As such I now consider this mor of a prototype sett, and an technique experimentation than the final sett.
This post will give mostly an overview over what I have done and some of the challenges that I have faced, as well as any changes I think I want to do. Reading this should get you up to speed with where I am today. I will also post some more in-depth posts on various aspects of the build, diving deeper into the techniques.
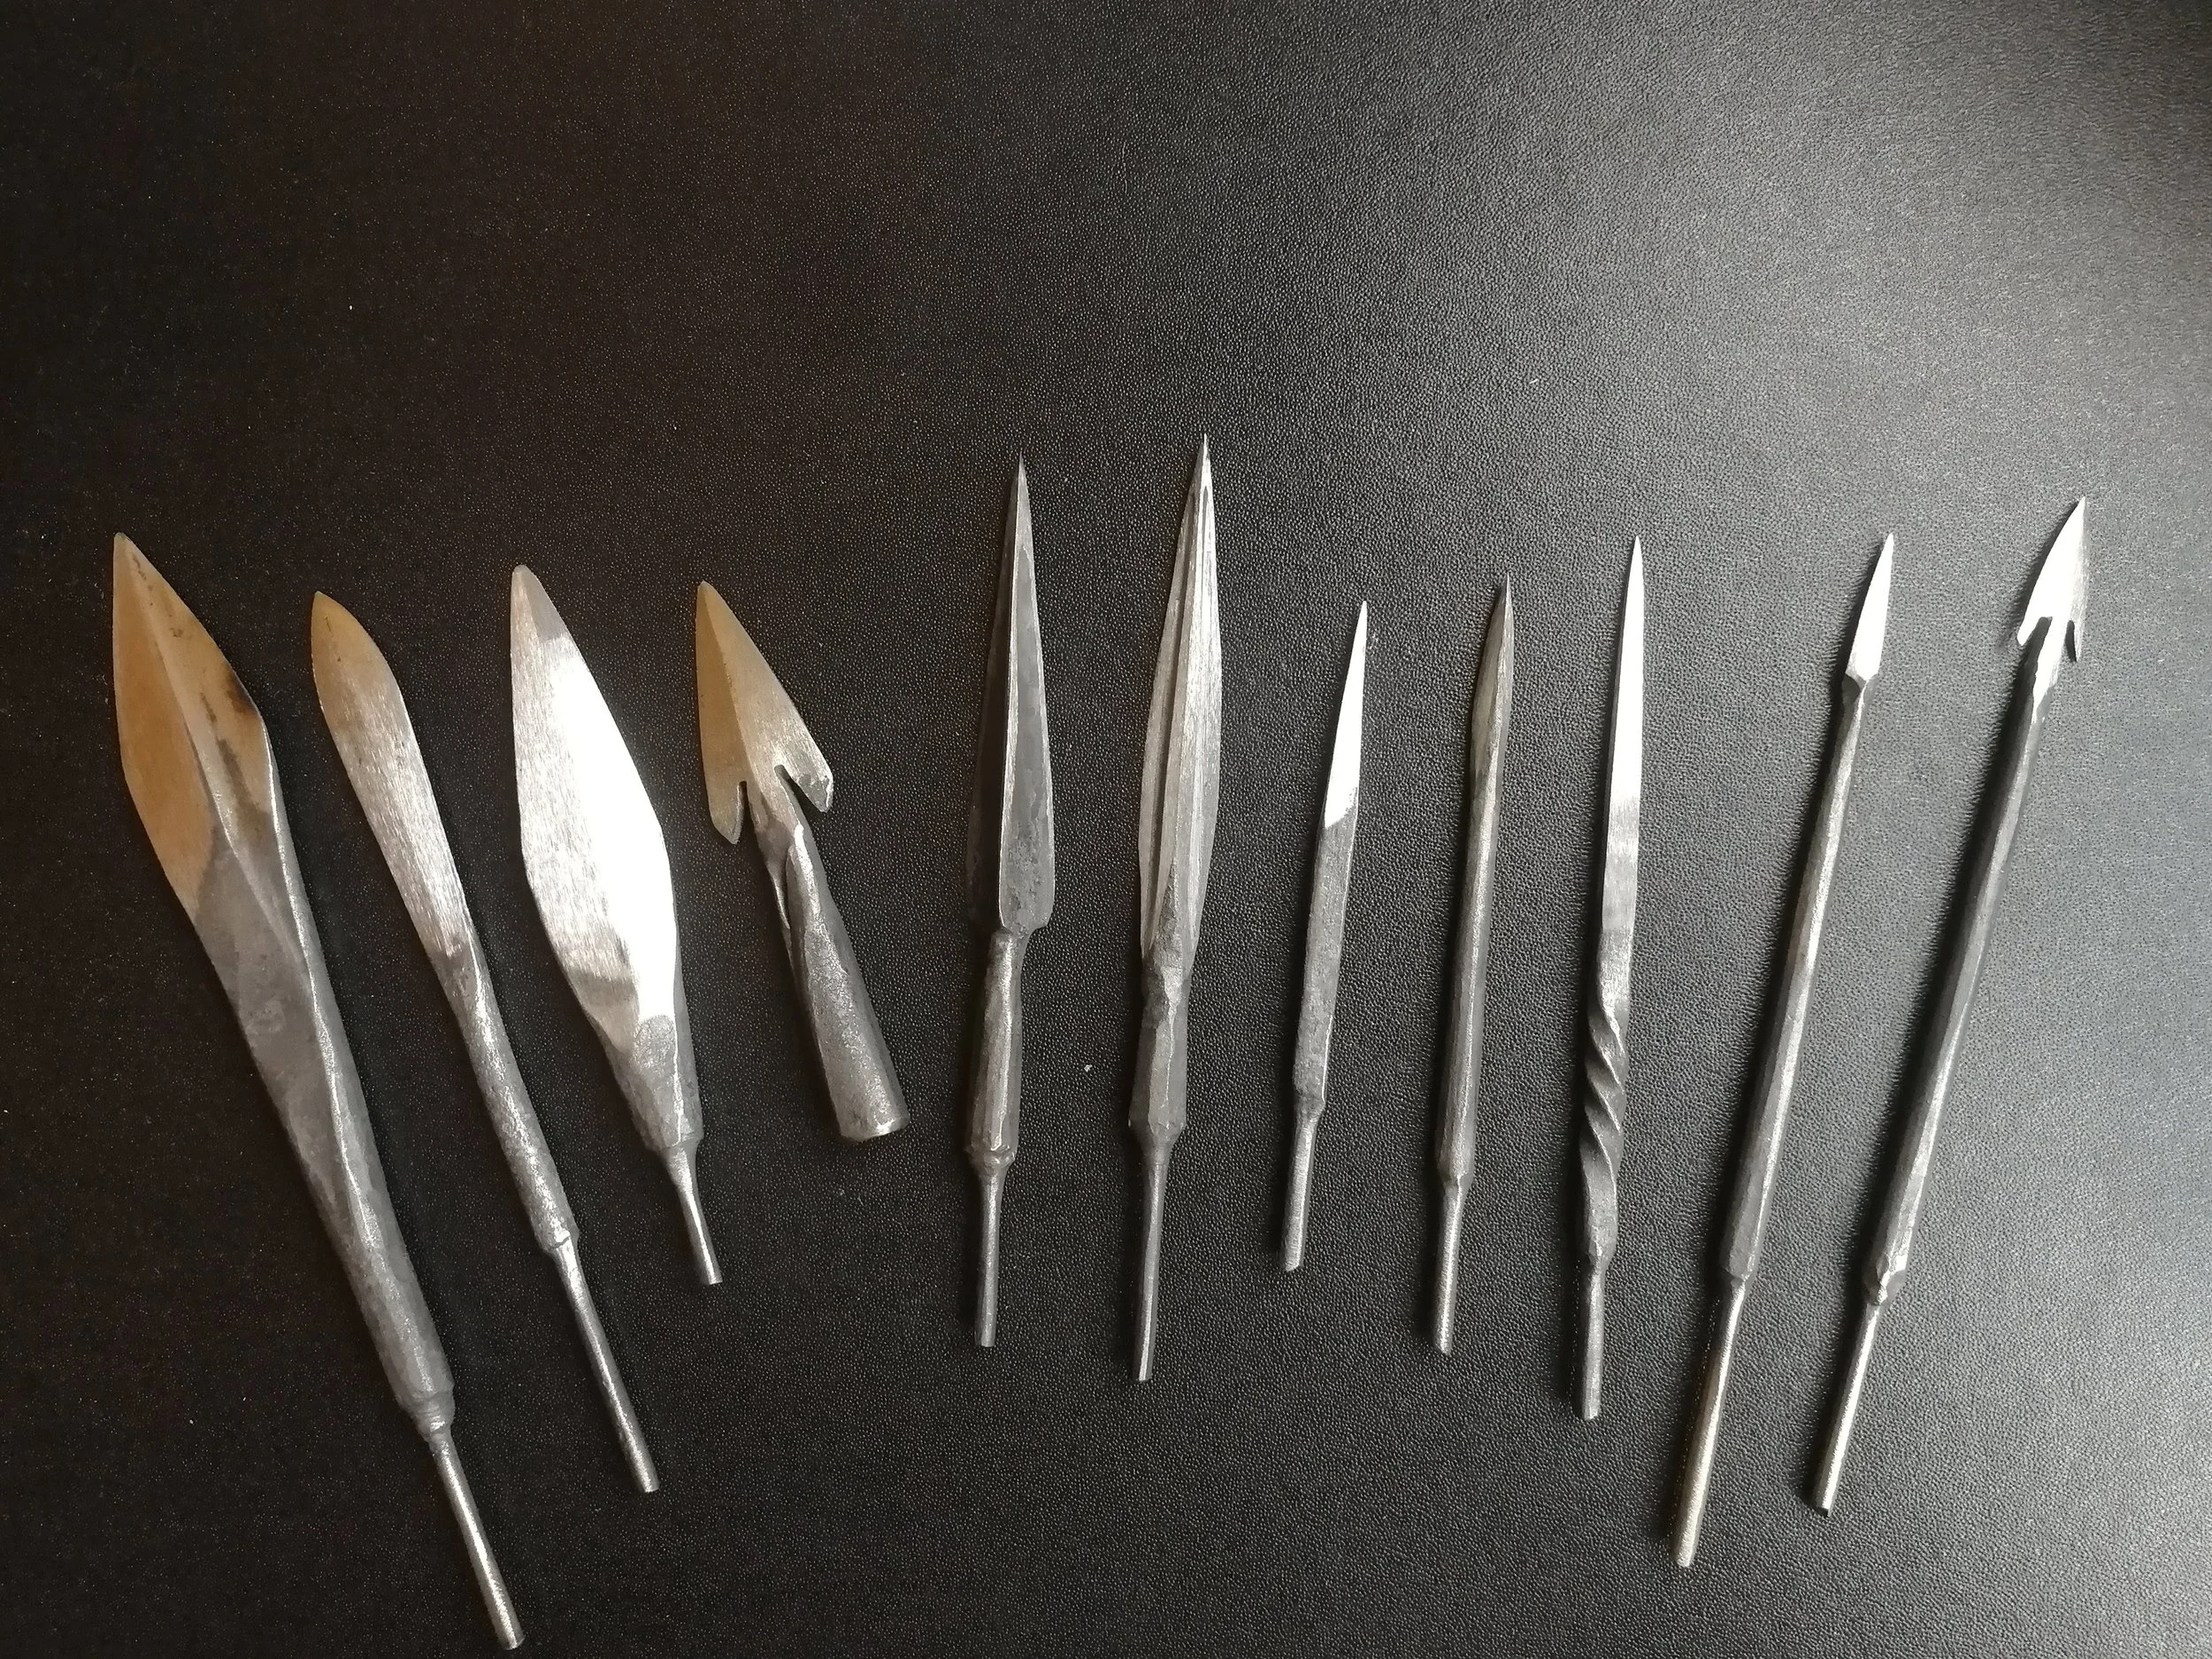
The first task for this project was to acquire the arrowheads. This was in a time that Viking had not yet become a massive public craze. And the task of finding someone selling these heads was nigh on impossible. As such I turned to a local blacksmith friend of mine. We spent about half a year talking these heads over and coming up with measurements and the nine corroded design.
Mind, Arrowsmithing is it’s own discipline and my friend was no arrowsmith. The aim in this set was to make them look and roughly behave as the original would. If this had worked we were going to make more exacting arrows
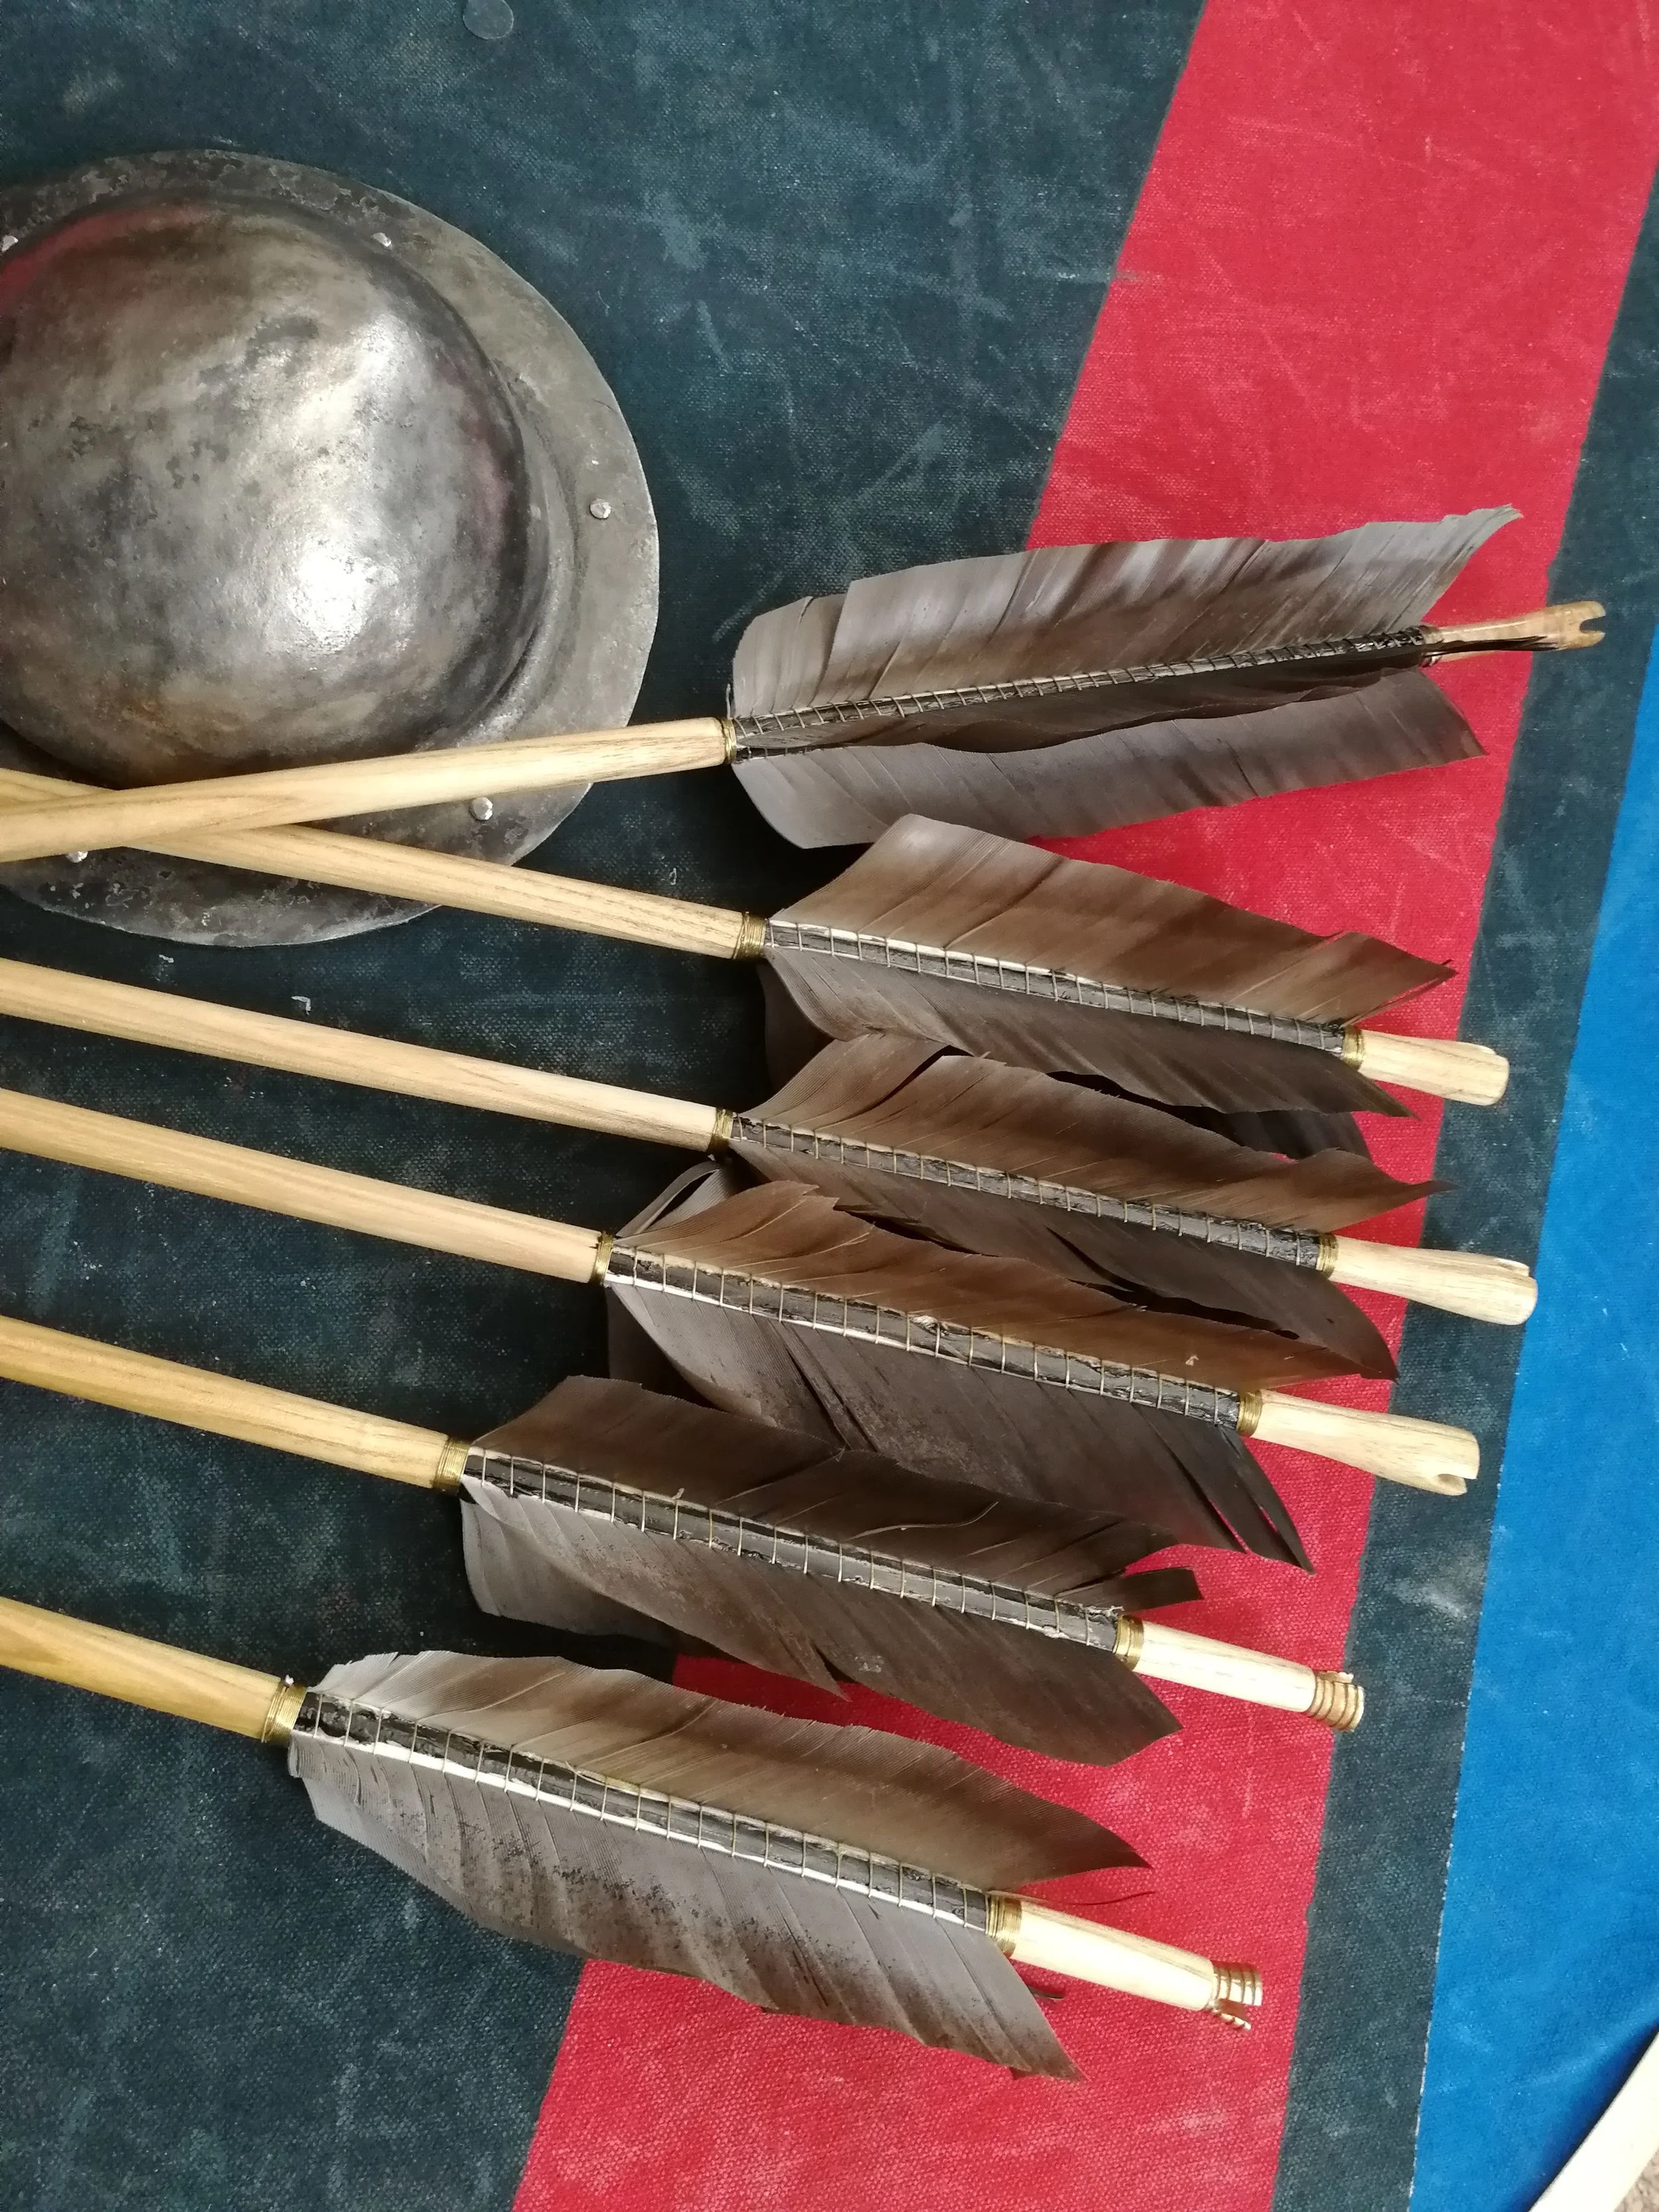
With arrowheads in hand it was time to start making bathe arrows. The first section of the sett was going to be remakes of some of the more fancy arrows of the find with bronze nocks and bronze whipping. I was able to acquire the bronze components easily enough, which was a pleasant surprise after the effort of getting hold of the arrowheads.

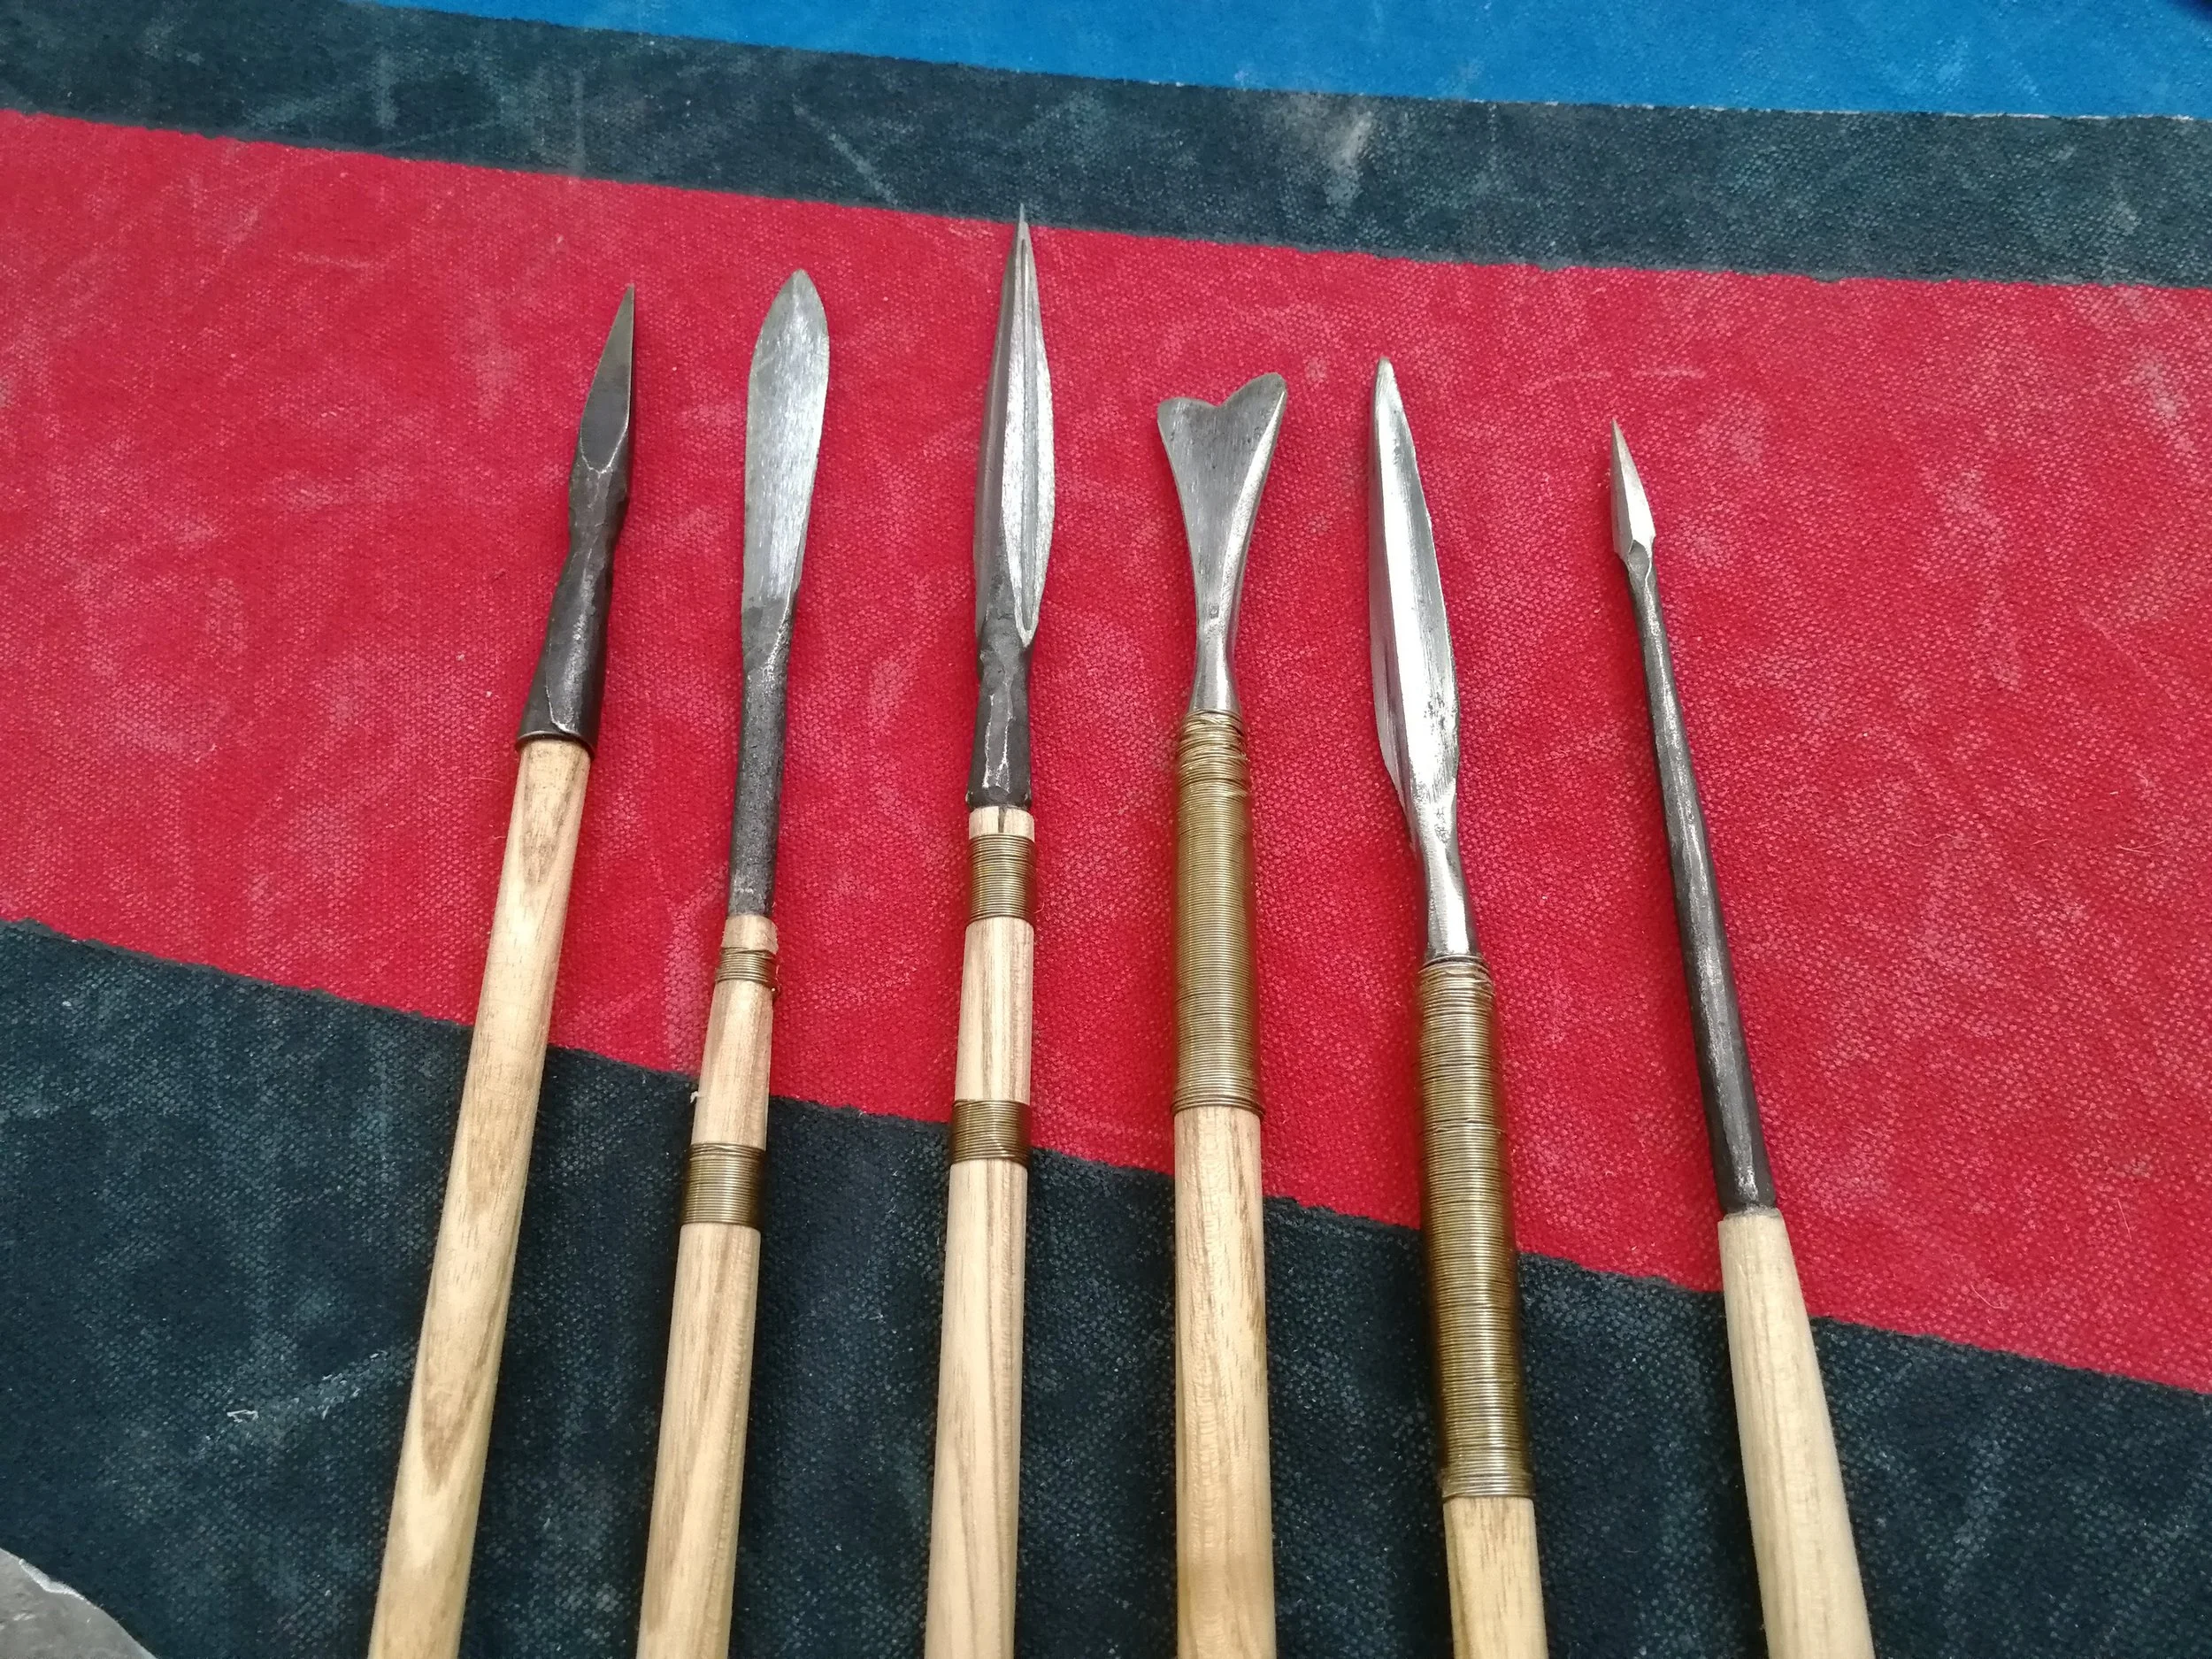
Now the work could start in ernest. Tha shafts we’re planed out of ash staves. Match the required profile (a separate post on shaft profiles will come).


Two arrows were prepared to be fitted with bronze nocks, while the rest were done with wood reinforced nocks.

Fletchings were stripped from goose. The original arrows would have been fletched using Eagle feathers, However it was not possible for me to get hold of any. As such chose to use the alternative goose. I used birch pitch to fasten the fletchings before whipping. Several of the fletchings where whipped in bronze thread. I have done that for several of the fletchings. Some will be whipped with nettle cordage. This is a task for the future.

The arrowhead appeared to be fastened in several ways, some were barred in, while others seemed to have been fastened by splitting the saft before binding. I spent some time experimenting with several approaches to fastening the arrows. From experience I can say that the most effective method is to splitt the shaft, followed by burning inn the tanged arrowhead to create a tight fit.


A handfull of the arrows have been finished by now. The upcoming work is mostly concerned with finishing up more of the arrows of what has now become more of a proof of concept for these arrows. I will be documenting the process of applying the pitch, and whipping in more detail. The same will also be done for whipping and fastening the arrowheads.
Another important tak ahead, is to make another sett of arrowheads. This will be a longtime process, as my goal is to make them myself. I will be documenting the process and line of thought. Several more articles will trikkle to as I work on this fascinating arrow set.
But for now you have received the overview of the process and what has been done. Hopefully this has triggered som curiosity and I hope you will enjoy following along with the more detailed build posts.